Yoga for Performancesm: Introduction
Take The Magic Step® Yoga Program
I hope you already have enjoyed reading about a few fundamental aspects of yoga on our Website. We explored different yoga styles, and offered suggestions on how to begin your own practice, including where, when, and with whom. We also introduced you to its many health benefits. And I shared with you my own personal journey with yoga in the article “Yoga for the Right Balance.” If you would like to get more information about these and other related topics, you can find them under the tip section “Yoga” on the left hand margin.
After many years of study, field research with the professional athletes of KIMbia, and long hours of training on the beloved yoga mat, I am happy to share with you the Take The Magic Step® Yoga Program: Yoga for Performancesm. It is comprised of an effective mix of stretching, strengthening, and stabilization exercises as well as breathing exercises and meditation. While these poses are designed to be integrated into any athletic training plan, there will be, of course, a specific sequence for running.
In the process of learning each yoga pose (known as “asana”) I hope you will be able to personally experience the benefits of this program. It not only promotes complete muscle alignment, stronger ligaments, and greater flexibility for injury prevention, but it also assists in pre-workout warm-ups as well as aiding in energy restoration and cool-downs afterwards. Soon after starting the program you may begin to notice feelings of reduced stress and greater body awareness, together with improved concentration and mental focus—invaluable skills for training, competition, and other areas of life. You may feel, as I did from my first yoga session, that yoga complements your sport of choice in a truly wonderful way. It is a two-fold practice: substantially improving physical performance while, at the same time, offering us many other lessons if we choose to go deeper.
I can’t emphasize enough how much yoga has helped me remain healthy and energized since I started practicing it in 2001. From then on, a daily yoga session became a staple in my life, affording me the opportunity to constantly learn new things about each asana, breathing techniques, or playing with different sequences to include in my running and training routine.
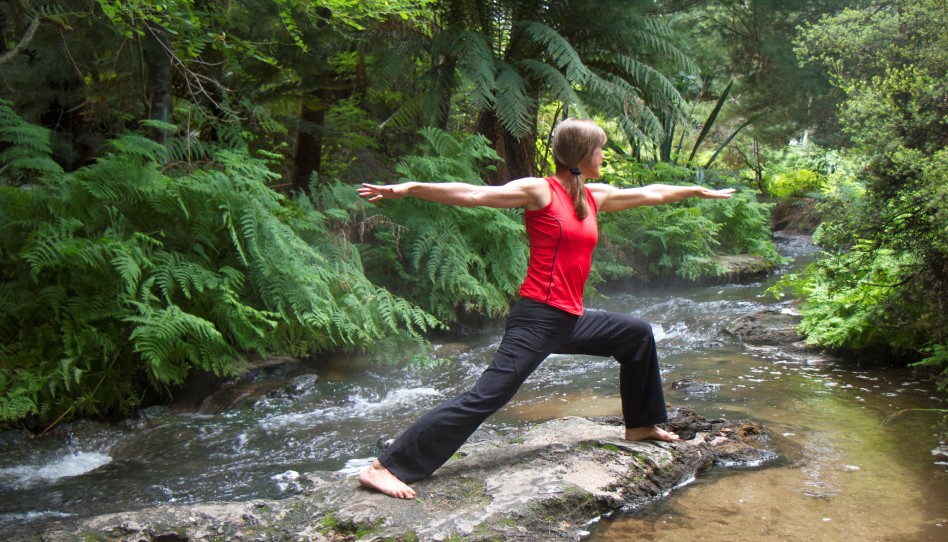
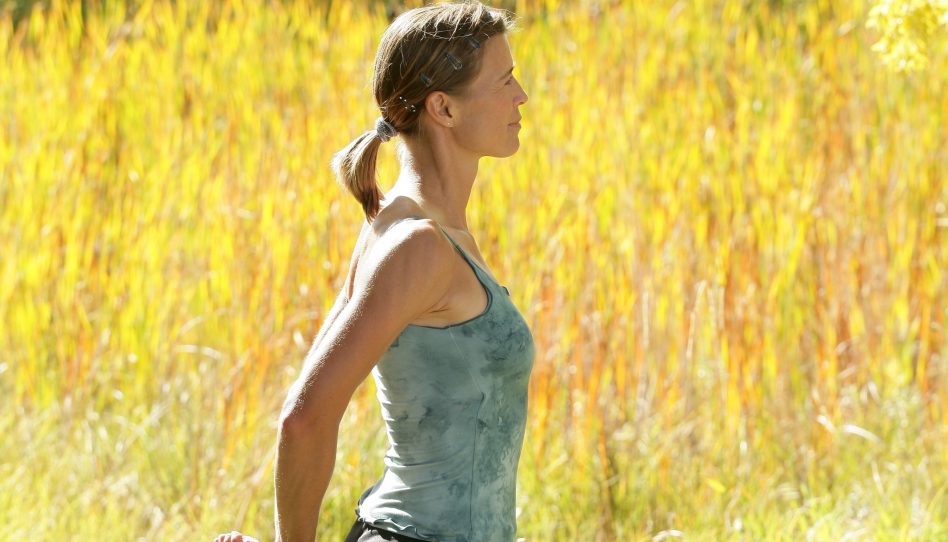
When I first introduced yoga to our Website, I invited Lynne Eppel, a certified yoga instructor for many years and lifelong yoga student, to bring her special skills and expertise to the Take The Magic Step team. Lynne has helped me in my own practice, just as she has helped so many other students. She is also our yoga model in many of the accompanying pictures. (You might recognize the second yoga model, too.)
We had enormous fun on our yoga photo shoot. We chose to take most of the shots outdoors in early autumn because the warmth, colors, and stillness of the season reflect our own ideas of achieving an inner peace and stillness upon which you will be training and building from the inside out. When weather permits, try taking your own practice outdoors—you might find it invigorating!
The Start
The following six asanas can be included in each of your yoga routines. I chose them for our introduction, and I will later share with you further asanas of the Take The Magic Step Yoga Program. The whole series are poses selected from many available because of their particularly healthful impact on runners and other athletes. All are appropriate for beginners. We sometimes hear people say, “I’m not flexible, I can’t do yoga.” So, maybe that makes you perfect for yoga, just try! How far you are able to move into a pose is exactly right for where you are now.
Yoga is neither a competitive nor a destination sport. The benefits come from your efforts, not the final result. Towards that end, it is important to remember that when you are doing a pose, only go to the point where you feel the start of resistance and hold there. Please do not force through this resistance, as doing so may cause strain! Over time, I hope you will find that your body becomes more and more flexible.
Breathing is an essential aspect of yoga. Ideally, all breathing is done through the nose with the lips softly closed and the jaw relaxed. When practicing, keep in mind the breath cues (see below). Though this may not come naturally at first, a little perseverance will pay off in the long run. Your breath and body will begin to move as one—this is a very powerful aspect of yoga and leads to greater integration between one’s mind and one’s body.
Let your body be the guide as to how many repetitions of each pose you perform. Repetitions will also depend on how many other poses you are including in your practice. The final asana, Corpse Pose (“savasana”) is only held once, at the end of your practice. Ideally, we rest in this position for about 10 minutes. We have given two benefits per pose for brevity’s sake, but be assured that every asana actually delivers multiple benefits to both body and mind.
Roll out your mat, get in position, and take a deep breath! You are about to take a new step into Yoga…
The Poses
Mountain Pose — Tadasana
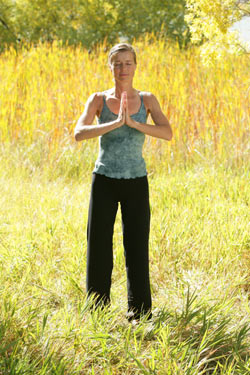

Benefits:
- This primary standing pose allows us to check our posture. It encourages a lengthened spine, open chest, and relaxed shoulders. It also can be used to align the body between other poses.
- Typically practiced first in our yoga routine, Tadasana promotes grounding. It can enhance balance when practiced with closed eyes.
How to:
- Stand erect with feet a hip width apart. Breathe slowly and deeply through the nose. Connect the 4 corners of the feet to the earth: big toe, little toe, inner and outer heel. Feel the weight of your body evenly centered over the feet.
- Close the eyes and gaze inwards. Appreciate your body in its balanced state, feeling your strong connection with the earth. Open the eyes and look straight ahead.
- Let your spine lengthen upwards from the feet. Be careful not to flatten or over-arch your lower back: you want a natural, gentle curve to the lower spine.
- Softly roll the shoulders back and down to open the chest which allows for a spacious feeling in the heart. Gently place the palms of your hands together in front of the chest.
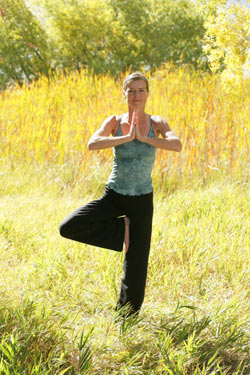
Tree Pose — Vrksasana
Benefits:
- Vrksasana is one of yoga’s classic balancing poses. Here, we practice it right after Mountain Pose, although it can also be done later in the practice. This fun and challenging pose increases focus, quiets the mind, and aids in rediscovering the body’s balance (an often neglected talent as we get older).
- Tree Pose helps to strengthen the muscles of the supporting foot.
How to:
- Stand in Mountain Pose, breathing deeply through the nose and bring your awareness to the feet. Slowly shift your weight to the left leg. Bend your right leg towards the chest, and with the help of your right hand place the heel of your right foot firmly against the top of the inner left thigh. Keep the right thigh opening outward. Let your right foot rest in this position with the toes pointing downwards.
- To actively find balance, lengthen the spine up and let the shoulders soften back then drop the right side of your pelvis. Your hips should be level.
- Bring the palms of your hands together in front of your chest. Balance on your left leg while focusing with your eyes on an object straight ahead of you. You may find better balance by gently pushing the palms of the hands against each other. With an inhalation you can raise your arms straight over your head.
- Breathe deeply while standing in this position, then lower your arms and your right leg slowly to return to Mountain Pose. Repeat Tree Pose with the opposite leg.
Downward-Facing Dog Pose — Adho Mukha Svanasana
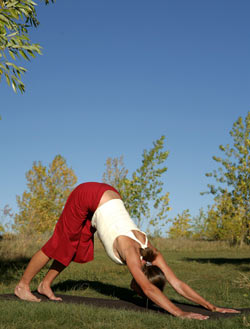
Benefits:
- Adho Mukha Svanasana is a great pose for warming-up or cooling down after athletic workouts, especially easy jogging. Our athletes and clients like this multi stretching and strengthening pose, and enjoy the challenge it presents.
- Fantastic for lengthening the hamstrings and calves. It also opens the chest, and stretches and strengthens the shoulders, belly, and back. Downward Dog aids in releasing tension in the body, especially along the spine and neck. In addition, because the head is lower than the heart, there is an increased blood circulation to the head that nourishes the brain cells.
How to:
- Start at the front of the yoga mat in Mountain Pose. Exhale as you bend down, and go to your hands and knees, hands under the shoulder, knees under hips, and fingers spread and rooted on the mat with the middle fingers pointed straight ahead.
- With your next exhalation, tuck the toes under, and leading from the belly slowly lift the pelvis to form an inverted V with the body. The feet should remain about hip width apart.
- Inhale, and on the next exhalation move your chest towards your thighs as you press the sitting bones upward, lengthening out the spine. As the palms of the hands press into the floor, the heels are pressing downward towards the mat with the toes facing straight ahead. The muscles of the backs of the legs will be stretched, but the knees are not locked.
- Now focus on your upper body: Rotate the shoulders externally so that the upper arms move away from the ears while the head come closer to the mat. Allow the neck to stretch and lengthen. Breathe evenly for several breaths, and feel the multiple sensations in the different areas of your body. Step forward slowly, one foot at a time, coming out of the pose on your next inhalation.
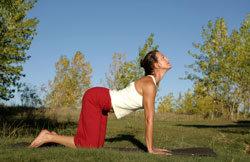
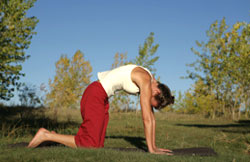
Cat/Cow — Viralasana
Benefits:
- Viralasana creates body awareness, especially in the area of the spine. The student may experience lengthening of the spine as they focus on the space between each of the vertebral joints. This pose also increases spinal mobility.
- This smooth flowing posture teaches us how to join our breath to the movements of our body. Ideal to incorporate in your ‘after workout’ routine.
How to:
- Start on all fours, the hands right under the shoulders and the knees under the hips.
- Inhale as you lift your head and tailbone—your back will become concave. (Imagine a cow with a heavy udder!) Keep the elbows straight and the shoulders over the hands. Make sure the shoulders are relaxed and not drawing closer to the ears.
- As you exhale, start to tuck your head and tailbone way under. This will allow the back to become fully round (like a spooked cat).
- Allow your breath to flow smoothly with your movements. Feel the entire length of the spine as it flexes and extends. The goal is to experience the movement of the spine as a gentle wave.
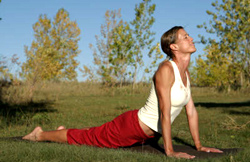
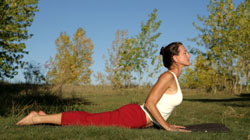
Cobra — Bhujangasana
Benefits:
- The spine receives a powerful backward stretch, and the surrounding muscles are strengthened. The Cobra Pose improves erect posture, which is very important for runners and friends of many other sports.
- Opens the chest, and tones up and massages the abdominal organs.
How to:
- Lie on your belly. Place the hands close to the body on either side of the torso, at nipple height. The body is long and the feet are together with the tops of the feet pressing down on the mat (like a cobra’s tail).
- Tuck the tailbone under so the pubic bone presses to the floor. Inhale and slowly lift the chest upward, using very little pressure on the hands. The shoulders stay soft and moving down the back so the neck remains long.
- To deepen the pose, increase the pressure on the hands. Pull the chest up and forward through the arms, continuing to curl the spine up off the floor so the arch in the back deepens. The neck stays long as you gently gaze up.
- Exhale and slowly roll down, ending with the forehead on the mat.
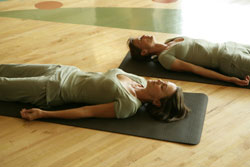
Corpse Pose — Savasava
Benefits:
- Removes all stress from the spine, and restores its natural symmetry. A beautiful resting pose after a demanding workout or a long day.
- Allows the practitioner time to fully absorb and assimilate the benefits of their practice. It rests the whole system, lowers respiration and pulse rate, reduces stress, and allows one to finish in a relaxed and refreshed state.
How to:
- Lie on your back, feet spread about 18 inches apart. Let your thighs, knees, and toes turn outward.
- Let your arms open, hands about 6 inches from the sides. Allow the palms to face upwards in a receptive gesture.
- Allow the shoulders to gently spread out on the floor. The jaw is soft and the eyes heavy in their sockets. Imagine the whole body as warm, heavy wax, melting into the floor.
- Bring your attention to the breath. Allow it to flow naturally and freely from the nostrils. Imagine the entire body breathing and expanding. This practice becomes easier and deeper over time. Always treat yourself with compassion, not impatience, if you initially find it hard to relax.
Reading Suggestions:
Updated November 10, 2018
Updated November 15, 2013
Updated November 1, 2011
Posted November 3, 2006
- Posted November 15, 2013
© Copyright 2006-2026 Uta Pippig and Take The Magic Step®. All Rights Reserved.